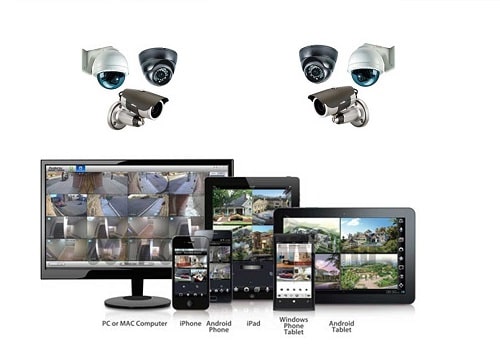
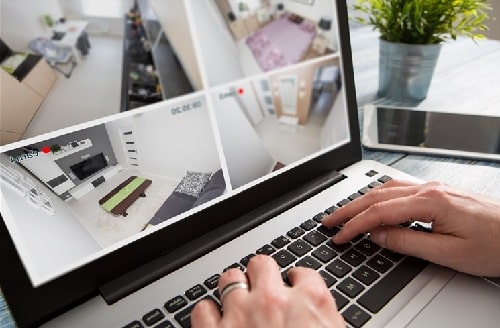
View Security Cameras on PC can take too much time to learn if it’s your first time dealing with surveillance monitor devices.
Everyone who cares about his family’s privacy and safety searches for a professional security camera with advanced features.
Nowadays, security cameras can record videos at night using Night Vision advantage, capture animals and people’s movements using motion detection, and remote viewing.
Remote watching is beneficial for business holders and homeowners. As it enables you to view security cameras on PC live at any time and access it from any place. So, you can see what’s happening to your dear ones while you are not around.
According to Reports “Most people like to purchase security cameras to monitor their office or home through PC to keep an eye on their business or home.”
However, a lot of customers don’t get familiar with how to view security cameras on PC remotely with the internet.
In this article, you’ll learn in few simple steps how to view security cameras on PC without wasting time or money on hiring professionals.
How to View Security Cameras on PC Methods
There are lots of methods to view security cameras on PC. However, here we would cover the 5 easy methods.
These solutions would help you to connect your camera whatever a PoE IP or wireless camera to a PC and stream your cam videos.
Note: The 5 methods work on PCs with different operating systems such as Windows 8.1, Windows 10, Windows 7, Windows 8, Windows Vista, and Windows XP.
How to Stream Camera Videos on PC Successfully?
To view security cameras on PC there are fixed rules that must be done before involving in any below method.
Firstly, make sure to set up your camera in the correct position. Due to the wrong position, you would not be able to watch the footage from the right angle.
Secondly, ensure that your PC has enough storage space in case you want to save recorded videos, if you’re not, and install a camera for live view only you don’t need to use a hard drive.
Thirdly, check the wire connections before the start at viewing security cameras on PC, Also power wires and batteries if you have.
Now, let’s dive in and see View Security Cameras on PC in different ways
Method 1: Connect PoE Camera Directly to PC
One of the basic ways to view security cameras on PC/MAC is to link the PoE camera directly to a Personal computer or Laptop.
Each PC device has an ethernet port in its back, this port is generally used to connect PC with Internet from Router. But, at this time a lot of wireless Laptops and PCs work without needing Ethernet cables.
So, you can use this port in your task of viewing security cameras on PC but you should follow the below steps
Step 1: Connect your PoE or CCTV Camera directly to the PC using an Ethernet cable, if it’s a wifi IP camera you must plug in and charge before starting any work.
Step 2: In the case of Wired Analog CCTV cameras with Coaxial cable, make sure you have a 2-in-1 or 3-in-1 cable connector depending on your cam. Attach the first end of the cable in the camera and the other end into PC/Mac.
Step 3: Once you finish the basic and physical connections of your system, Now you should continue through virtual connections.
Step4: Each security camera has a default IP address, Search for that IP address on your computer.
Note: There is surveillance software provided by the camera seller you can use. For example, Reolink has software called Reolink Client for scanning and finding the camera’s IP.
Step5: in this step, you need to change the network prefix and make it the same in both computers and cameras.
For your knowledge, Each IP address consists of 32 bits shown as 4 octets, and each octet represented in decimal form starts from 0 to 255.
For Parts, any IP has 2 Parts, The First one identifying the network, and The Second one identifying the host, or node. The nodes on any network share the same network prefix but differ only in the host number as its unique number.
To view security cameras on PC directly you should change the network prefix of your PC and make it the same with security cameras.
Let’s say your camera IP address is 192.168.155.55 and your computer IP is 192.168.100.55.
The Next Step is to change your PC IP first and make it 192.168.155. X where X is the unique host number.
You can select any number from 0 to 255, let’s say 200, then your PC’s new IP is 192.168.155.200.
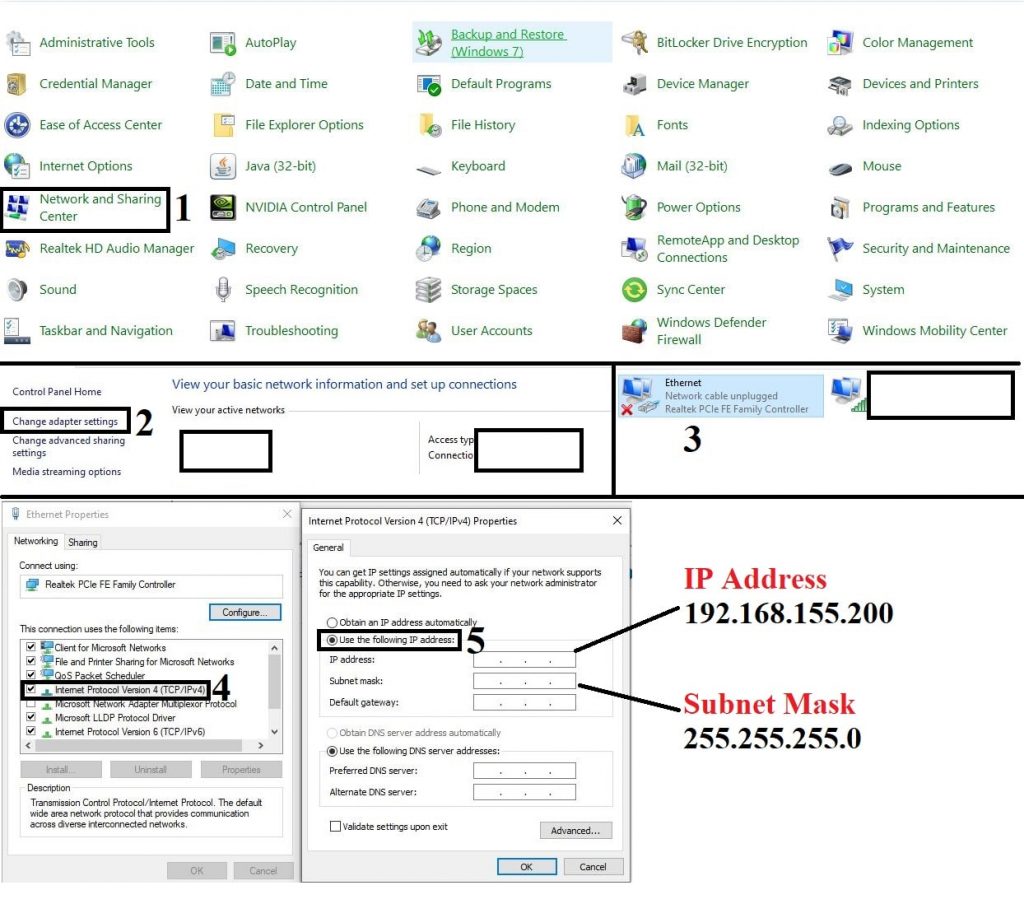
Here are the steps of changing the IP address of PC on Microsoft Windows
- Search For Control Panel in the Search Bar.
- Next, select Network and Sharing Center.
- Look for Change Adapter Settings then click on it.
- Once you click on it a new window opens showing the network connections Ethernet, and WiFi.
- On the Ethernet Connection use the right click and choose properties.
- The Ethernet Properties window will open, go below and select Internet Protocol Version4 (TCP/IPv4) and then click on properties.
- The default option is to Obtain an IP address automatically as most computers enable DHCP, change it to Use the following IP address.
- The last step is to write your IP address which is 192.168.155.200, and in the subnet mask click on the Tab button on the keyboard to fill it automatically.
- Save the changes to avoid repeating the same steps every time and ensure that you disable DHCP and enable Static IP.
- Now you are ready to stream your security camera feeds on a PC.
Here is the Infographic for steps

Step6: Open any browser on your PC whatever google chrome, safari, Mozilla Firefox, and write your Camera IP on the bar and the camera footage will appear live.
Method 2: Port Forwarding
Port Forwarding is another solution you can use to View security cameras on PC by using the internet.
This method differs from the first one, it allows you to watch security cameras on a PC remotely from anywhere at any time.

Networking Engineers define port forwarding or port mapping as a function in network routers that use NAT (network address translation) to enable users to configure specific communication ports to reach devices on the Network such as computers, DVR/NVR, and IP cameras.
So, before thinking about using this method you should have
- Internet Connection
- Network Video Recorder Box (NVR)
- Admin Access to the router or modem
- IP security cameras
- Personal Computer
Step 1: Before setup port forwarding for a distant approach, firstly, you must get cameras connected on the LAN.
Step 2: See the user manual to check the port which your camera uses, and you can do it through your mobile phone or PC by accessing the DVR/NVR.
.
Normally, once you connect the IP camera to the router and switch it on, the camera is allotted an IP address from the router. It is called DHCP. For Port forward, you must change configurations of DHCP to static IP.
The most ports used in DVR surveillance systems is
- HTTP traffic port that serves up the webpage you see in Internet Explorer (Port 80)
- TCP type video streaming port that is necessary for remote viewing video (Port 37777)
- UDP type data streaming port which is optional to enable/disable (Port 37778)
- TCP and UDP type port that allows video to be accessed from the DVR using RTSP protocol, mostly used in streaming camera videos (Port 554)
Step 3: Many IP cameras comprise PC desktop software to explore your network for IP cameras. If your camera includes, use this software to trace the IP address of your camera and note it down.
Step 4: Once you know the port used in the DVR and make the DVR IP is static, then it’s time to configure a Router and create instance rules.
Step5: Open a browser and write the Router IP which is probably 192.168.1.1, then it will ask you to fill in and enter the username and password after that you go into the router main page.
Note: Some router providers have default username and passwords which is admin/admin, if not you can see the router label or contact router manufacturer.
Step6: Create the port forward rules, you may find them in the Virtual Server section or NAT section depending on your Router model.
Step7: After filling in all the information needed and writing your DVR IP and Port correctly you finish 80% of the job. Then reboot the router.
Step8: Open your smartphone or any laptop that doesn’t on the same network, then open the internet browser and write HTTP://(camera IP):(Port Number)
After finishing the above steps you’re ready to view security cameras on PC whatever is the PC you’re using in the house or office.
While this method is considered one of the hardest ways to Watch CCTV cameras From Anywhere Using Internet, it’s effective and easy if you have a technical background.
Method3. Install a PC Live View Third-Party Software
The third method you can go into to view security cameras on PC is by using PC live View Software or streaming apps available online.
There is a lot of software out there, some of them are free and others are paid with monthly subscription fees. For apps, some of them are for smart TVs and the other for PC.
So, for streaming surveillance cameras on PC, there are general rules and steps you should follow, Here it is
Step 1: Firstly, download & install the Streaming PC software such as VLC media player, Many Cam, and Security Eye.
Step 2: If you like to view security cameras on PC remotely, you must go for advanced 4G cameras that are compatible with live streaming protocols such as RTSP, HLS, and HDS.
Although these cameras as well empower WiFi connections, they Might guarantee you watch live camera streaming while WiFi is out of access.
Step3: Start the software and firmly pair your security camera through a QR code sited on the Recorder.
Step 4: adjust the surveillance settings to equal the watching requirements of your system.
Step 5: Tap on the camera, and you may watch the live streaming of the cameras outside & inside of your place.
These are the most common steps to view security cameras on PC using Live stream software, it’s simple and suitable for both beginners and professionals.
Method4. View Security Cameras On PC Using NVR
The 4th Method in our guide to view security cameras on PC is by using the basic principle of connecting Security cameras to a Smart TV screen.

This way depends on using VGA or HDMI cable, so to get the best result of this method make sure that your PC supports a VGA or HDMI port.
Here Are the Steps
Step1: If your NVR doesn’t comprise integrated WiFi support, then you need to use an Internet Ethernet wire to connect your NVR to the internet through a router.
Step2: Plug 1 end of the provided HDMI wire into the HDMI jack on the back of the NVR.
Step3: Plug the 2nd end of the HDMI wire into the back of your PC, if you have VGA ports you can use the VGA cable and Hook up to PC using the same steps.
In case you want to view security cameras on PC remotely using NVR, you need additional steps.
Step 4: Make the connections between your Security cameras and the NVR first, then turn on your cams.
Step5: Depending on various models, to log into NVR Viewing software, you may need NVR login credentials & IP address.
Step6: Connect NVR to the Internet through router/ or modem, then launch NVR Viewing Software on PC.
Step7: login to your NVR account (password & username) and approach NVRs for remote Viewing to watch the cameras.
Note: PC Monitor should be set to a similar Input in which the HDMI is plugged in.
Method5: Use PoE Injector/Switch
Another easy method you can use to view security cameras on PC is to pick and PoE injector/Switch.
In case, your router doesn’t qualify for PoE, you require a PoE switch or PoE injector to connect your IP camera to your PC. you can use this device for pairing your camera with PC directly.
Step1: Connect the PoE IP camera to the PoE switch or injector.
Step2: Bring an Ethernet cable and connect it from the PoE injector to Network Router.
Step3: Plug in the power adapter of the PoE switch device into the power outlet.
Now you finish the connection joints, a few minutes later and test them and enjoy monitoring camera feeds on PC.
In case you have a wireless IP camera you first need to connect it to the router and make the configuration for it.
Once you setup the WiFi network configuration and link the wireless IP camera to your network, then you can connect it wirelessly.
The five above ways allow you to view security cameras on PC, each method suitable for specific purposes depending on your camera type and the number of cameras you have.
Summary
Hope this informative article about how to view a security camera on a PC helped you a lot. This guide will be updated from time to time with new or updated methods.
Security cameras make you able to keep an eye on your home, office, or property while you are away.
If you have any queries, feel free to drop them in the comment section below. We would love to answer you as soon as possible.
https://www.safebudgets.com/view-security-cameras-on-pc/
Comments
Post a Comment